
How To Create Your Own Cluster With VirtualBox
Are you itching to play with a cluster, but not lucky enough to have one at work? No problem. In this post I will show you how to create your own cluster with VirutalBox. For that you will create and configure a prototype node (Virtual Machine) that fits your needs and clone it to create a cluster.
This is a foundation for future posts where I will show how to use Ansible and other technologies operating on a cluster. But first things first - let’s create our own cluster of virtual machines.
Installing VirtualBox and creating a prototype VM
First you need VirtualBox, which you can download and install from here.
When VirtualBox is installed, download an image of VM. I will use new Ubuntu Server 16.04 LTS in my examples.
Let’s create the first node, which will be a prototype for the cluster:
- Click New button and fill in details of your virtual machine.
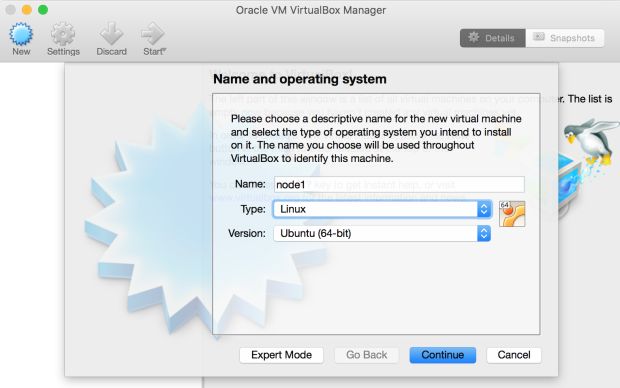
I won’t bore you with a plethora of screens. Below are options that I’ve chosen for screens to follow:
- Memory size: 1024MB
- Hard disk: Create a virtual hard disk now
- Hard disk file type: VDI (VirtualBox Disk Image)
- Storage on physical hard drive: Dynamically allocated
- File location and size: used defaults
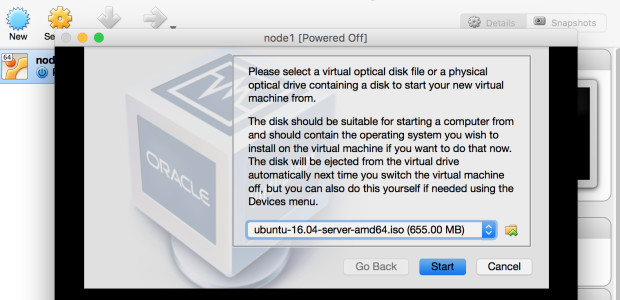
After VM is created, run it and you will see a screen suggesting you to choose OS image to be installed. Choose the image you downloaded earlier and install OS on the VM.
Configuring VM
Now when you have a VM with installed OS, it’s time to install all additional packages required. In this example we will install python and configure passwordless ssh from host. That’s a bare minimum required if you are going to use Ansible (as I will) for automated cluster configuration.
Installing python
Try which python and if it’s not found (missing in Ubuntu 16.04 LTS):
sudo apt-get update
sudo apt-get install python
Let’s try which python again. Now it should print something like:
/usr/bin/python
ssh to VM
To enable ssh from host to guest VM you need to create a port forwarding rule in VirtualBox. To do this open VM settings -> Network -> Advanced -> Port Forwarding and create a forwarding rule from host to the VM.
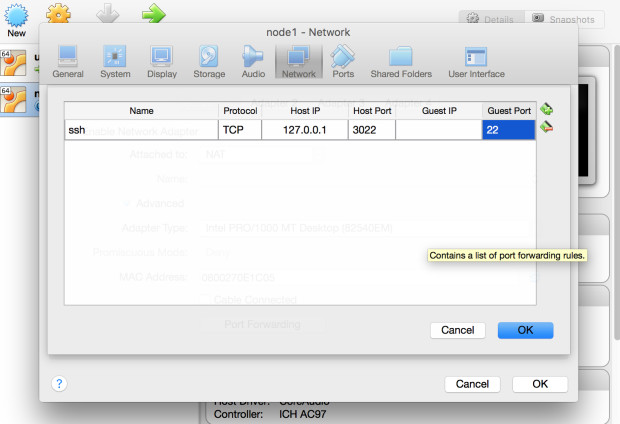
Now you should be able to ssh to your VM
ssh -p 3022 [email protected]
but you will have to enter the password. We’ll fix it soon.
passwordless ssh
If you don’t have public/private key pair already, run ssh-keygen and agree to all defaults. This will create id_rsa (private key) and id_rsa.pub (public key) in ~/.ssh directory.
Replace user yury in following snippets with a user you created for the VM.
Copy host public key to your VM:
scp -P 3022 ~/.ssh/id_rsa.pub [email protected]:~
Connect to the VM and add host public key to ~/.ssh/authorized_keys:
ssh -p 3022 [email protected]
mkdir ~/.ssh
chmod 700 ~/.ssh
cat ~/id_rsa.pub >> ~/.ssh/authorized_keys
chmod 644 ~/.ssh/authorized_keys
exit
Now you should be able to ssh to the VM without password.
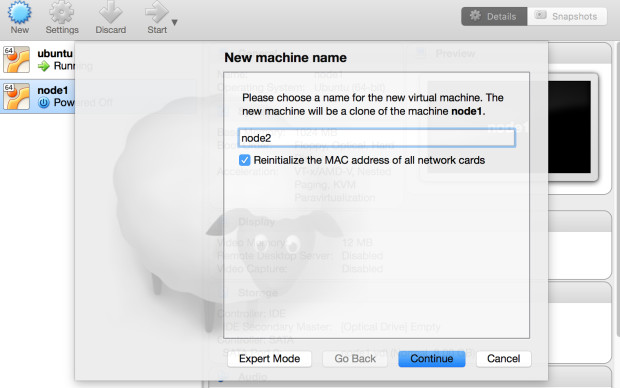
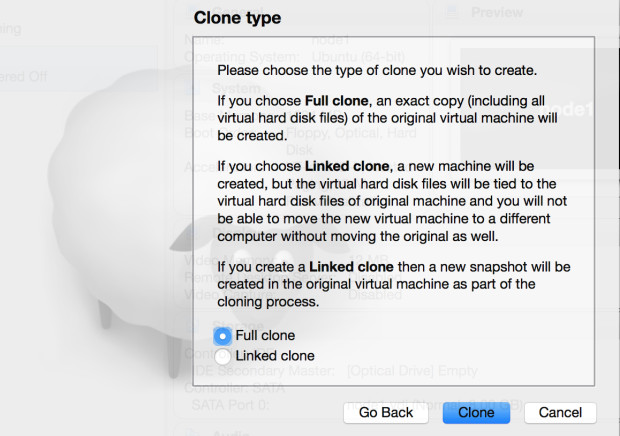
Cloning VM
When you have the prototype node configured, shutdown the node and clone it.
The only piece that is different for each cloned VM is host forwarding port, that we configured in VM settings -> Network -> Advanced -> Port Forwarding. We set it to 3022 for the prototype VM. Change it to a different value for each clone, e.g. 4022, 5022, …
Rinse and repeat.
Now you have your own cluster of VMs ready. Read on to learn how to configure Ansible to manage the cluster.